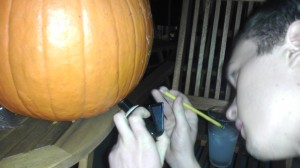
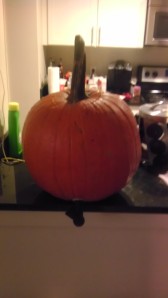
The Pumpkeg: Shamelessly cribbed and improved via power tools!

So, here is where I found the original instructions. If you watch it, it suggests doing the whole thing by hand. It’s a perfect bit of flair for any events in October or November!
What are we? Cavemen!? After writing off that ludicrous suggestion, I turned my attention to improving the process. Here’s their original list of necessary materials:
- one large pumpkin
- marker or pencil
- carving kit
- Plastic Spigot (aka tap)
- lots of Sam Adams Octoberfest beer
Here’s my improved list.
- one large pumpkin
- marker
- serrated knife (we used a cheap steak knife)
- Plastic Spigot (aka tap)
- whatever pumpkin flavored beer you’ve got for that double-pumpkin flavor (I’m partial to Elysian Night Owl’s Pumpkin Ale)
- Power Drill
- 1/2″ Drill Bit
- The Pumpkin Gutter Drill Bit
- Optionally, a rotary tool w/ various bits, depending on just how crafty you wanna get.
To begin, cut a hole in the top, ensuring that it’s large enough that you can easily fit and maneuver the Pumpkin Gutter (PG) through it. 
Next, grab your drill and put in the PG bit in your drill and crank that baby up to high speed. Get someone to hold the pumpkin steady and run the gutter along the edges of the inside of the pumpkin for a little, and empty the resultant pulp into a garbage can. You’ll probably need to repeat this process a few times to get most of it. It should only take a couple minutes. Feel free to apply pressure against the sides of the pumpkin, especially near the bottom. The gutter will thin out the sides of the pumpkin with sufficient force, which you’ll need to do anyway to mount the tap. 
Once you’ve removed most of the pumpkin guts, you’ll need to ensure that you’ve removed all of the seeds, since they’ll clog the tap.
Next, put the spigot near the bottom of the pumpkin and draw a circle around it. 
Keep in mind that since its gravity based, the closer to the bottom you put it, the better it’ll perform near the empty mark. Pop in the 1/2″ bit and punch a hole where you just marked.
The resultant hole diameter will be a tad smaller than the diameter of the spigot. That’s desirable, since it’ll help form a tight seal. Next, you’ll probably want to carve a little of the inside wall around the hole to accommodate the inner seal and nut. Finally, once you’ve thinned the surrounding area, you’re ready to install the tap. Place the white plastic seal with the flat side facing away from the outer pumpkin wall on the tap. Next, put the tap through the hole. Then, place the other white plastic seal with the angled side towards the front of the spout and place the nut over that. Tighten the nut. Below is a picture of the tap assembly (sans pumpkin wall, which goes between the two white seals. 
Finally, fill it with beer and enjoy! 
The whole process took about a half hour for me, but if you want to get really fancy, a rotary tool can be used for carving purposes. I didn’t have cutter bits at the time, but I suspect a few cutter bits, a grinding bit and perhaps a cut wheel would be sufficient to cut some badass designs. It should go without saying, but you are limited to designs which don’t actually puncture the pumpkin…
A few things to note regarding the beer. We used a dark winter seasonal, which worked pretty well with the flavors imparted by the pumpkin. I can’t imagine that light beer would be particularly good, but I’d consider it a pleasant surprise if someone tried it with positive results. One thing I wish I’d done better was chilling the beer. We did chill the beer, but it turns out pumpkins aren’t thermodynamically optimal for this application, and the last couple beers get pretty warm pretty quickly. Finally, we had a medium-large pumpkin, which held 6 beers very easily. I suspect that it would’ve cleared 12 gracefully. Use your best judgement, but a medium large pumpkin should do just fine for small gatherings (10-20 people) as long as you’re prepared to do a refill or two.
Special thanks to Matt for the assistance in constructing and documenting this Fall treat! If any of you lovely readers give it a shot, I’d love to hear about your exploits! Happy fall, yo!

